Back to Paper Mill Bridge Reconstruction Photos - June
Paper Mill Bridge Reconstruction Photos - May 9 and May 2
Paper Mill Bridge Reconstruction Photos - April
Paper Mill Bridge Reconstruction Photos - March/February
pmbmay26
The Paper Mill Covered Bridge Reconstruction in Photos
May 26, 2000
 Joe, I went over
to the Paper Mill on May 26, and saw that they have started the sideboards installation on the
down-river side. They painted the sideboards Barn red, and it looks great. The top knee braces
are almost done, they still had six or eight to do. They have started putting the roofing boards on
the west end of the roof, and have started putting the nailers for the sideboards on the upriver side
also. Later, David.
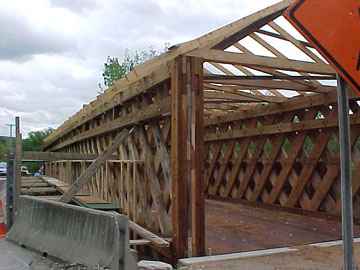 This shows the up river side with the nailers being installed. This end still
didn't have the top knee braces in it yet.
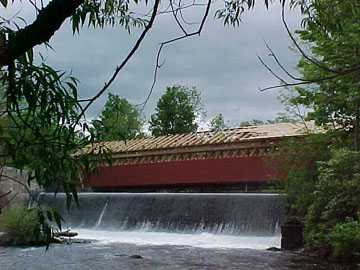 Shows the siding really nice from this vantage point.
 Just a portal shot that looked nice.
May 18, 2000
Joe, I got to go under the bridge today
to see what Mark Mackintosh was talking about with the bolts that secure the flooring sections to
the floor beams. All of the bolts were in place through the flooring, but have not been tightened
up yet. Not sure when that will be done, but all the holes that the bolts go through will be
covered with the big heads of the bolts.
This system will make it very easy to
replace any bad sections of flooring as the years go along. All that will need to be done is to take
off the nuts under the bridge, and take the bolts out, and then you will be able to lift the whole
bad section out, and put another one in, and then rebolt it to the floor beams.
In one of the pictures, you will notice
that there is a branch of a tree nailed to the end of the ridge pole. I was told this is done to honor
the trees that were used in the building of the bridge. Apparently it is a custom that carpenters
have done for generations. I think it is a fitting tribute in this case also.
The workers were busy installing the
last of the upper knee bracing in the rafters, and should be done with that today. The wood for the
roof is scheduled to be there by the end of the week. The roof will be covered in grey sheet metal,
the same as was used in the Coventry CB.
I was told that the completion date is to
be as close to July 1st as possible. The workers seem to think that is a reasonable target.
Yours in bridging,
David Guay
 Notice that there is a branch of a tree nailed to the end of the ridge pole.
This I was told is done to honor the trees that were used in the building of the bridge. Apparently
it is a custom that carpenters have followed for generations. I think it is a fitting tribute in this
case also.
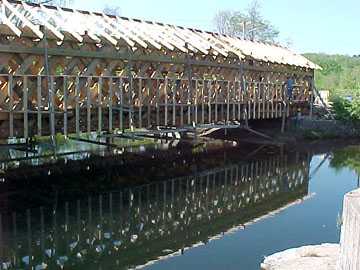 The workers are installing the nailing strips that the side boards will be
nailed to.
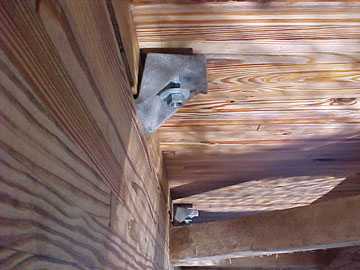 This shows how the bolts are attached under the flooring, and the
attachment fits into a groove that has bee cut into the side of the floor beam. When this is
tightened up, it will secure the flooring to the floor
beams.
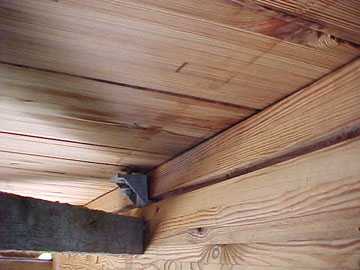 This is a real nice shot of the groove that has been cut into the side of the
floor beam so that the flooring bolt assembly can be fitted into the groove and then be tightened
up to secure the flooring sections.
 This shows the tops of the bolts that secure the flooring to the floor beam.
These bolts will be secured to both sides of the floor beam underneath it. Grooves have been cut
in both sides of the floor beam and the bolts are attached to both sides of the beam.
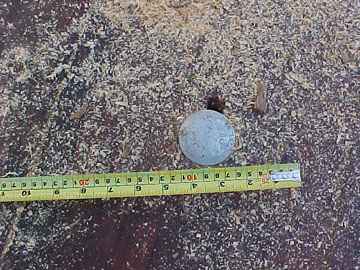 This shows the size of the head of the bolts used to secure the flooring.
After the bolts are tightened, the bolt-hole will be filled in so that moisture won't get into it.
Joe Nelson, P.O Box 267, Jericho, VT 05465-0267, jcnelson@together.net
No part of this web site may be reproduced without the written permission of Joseph C.
Nelson
Photographs and text by David Guay. Copyright ©, 2000, David Guay
This file updated June 13, 2000